
Step-by-step: Harvesting Yeast Slurry
Drain the beer from the fermenter, but leave 0.5–1 cm of beer on top of the yeast cake.
Swirl the yeast into the remaining liquid to create a uniform slurry.
Sanitize a jar or bottle with a lid (e.g. 0.5–1 liter).
Carefully pour the slurry into the jar – avoid the darkest trub at the bottom.
Store in the fridge at 0–4 °C.
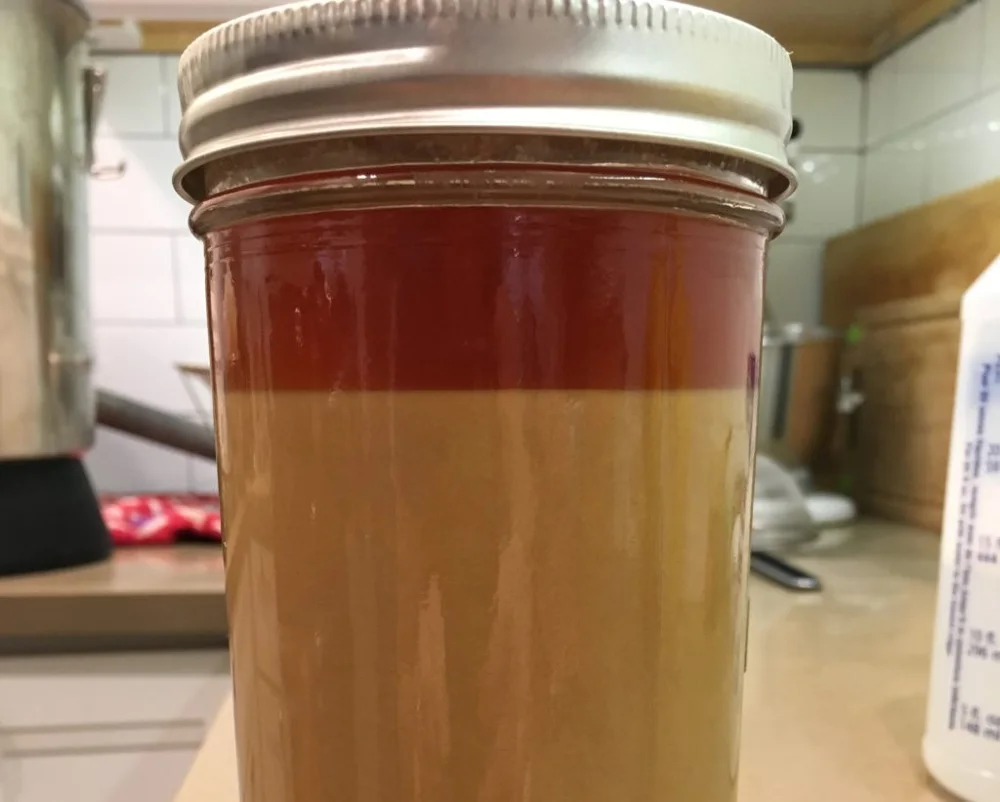
Let it settle and decant if you want to remove excess trub. The whiter layer in the middle is the healthy yeast!
Close the lid loosely for 12–24 hours (due to CO₂ buildup), then seal tightly.
Re-use up to 5-6 times. Maybe don't re-use yeast from a 10-14% beer, because the yeast can be stressed
Yeast Calculator (Reused Yeast Slurry)
Guide: Reusing Yeast Slurry in Homebrewing
Reusing yeast from previous brews is an effective and economical method used by many homebrewers. Here's a practical and detailed guide on how to collect, assess, and reuse yeast slurry correctly. The guide covers both ale and lager.
1 When and how do you harvest yeast?
After fermentation is complete, the yeast settles at the bottom of your fermenter as a creamy yeast cake. The best time to harvest is after the beer has been transferred, while a small amount of liquid still covers the yeast:
Leave a little beer (0.5–1 cm) on top of the yeast
Swirl the yeast into the liquid to create a pourable "slurry"
Pour the slurry into a clean and sanitized jar or bottle with a tight-fitting lid
Store in the fridge at 0–4 °C
If the slurry is very thick, you can add a little boiled and cooled water to adjust the consistency.
Tips: Always use sanitized equipment. Avoid scooping from the very bottom where the dark brown trub layer sits.
2 How do you evaluate if the yeast is good?
Color: Healthy yeast slurry is beige to cream-colored. If it’s very brown (like peanut butter), it’s likely old or dead.
Smell: It should smell like fresh brewing yeast or bread. If it smells sour, rotten, like sulfur, acetone, or vinegar – discard it.
Consistency: It should be like thick porridge or yogurt. No mold, film, or weird lumps on top. If you see odd layers or discoloration – do not use it.
3 Slurry thickness: Thin, normal, or thick?
The thickness of the yeast slurry affects how many cells are present per mL and how much you need to use:
Thin slurry: Very liquid, like soup. Approx. 0.75 billion cells/mL
Normal slurry: Like a milkshake or thick yogurt. Approx. 1.2 billion cells/mL
Thick slurry: Like dough or wet cement, barely pourable. Approx. 2.0 billion cells/mL
Assessment: Look at the jar after it’s been in the fridge for 30–60 minutes:
Clear liquid on top
Lighter yeast in the middle. This is the part you want to use
Dark trub at the bottom
4 Storage and shelf life
Store in fridge (0–4 °C)
Fresh slurry (<1 week) can be used directly
Slurry up to 3–4 weeks old is still usable, but cells gradually lose viability
If older than 4 weeks, a starter is recommended
Discard slurry with bad smell, discoloration, or visible mold
CO₂ Warning: Yeast may build pressure in the first few days. Keep the lid loose or vent briefly each day before sealing tightly.
5 Using the yeast calculator
Use a yeast calculator to determine how much slurry to pitch into your next batch:
Enter measurement system (L or gallons)
Enter beer volume and OG (Original Gravity)
Select yeast type (ale or lager)
Select yeast age (viability)
Select slurry thickness
The calculator will tell you how many mL of slurry to add. Don’t worry about slightly overpitching – but avoid underpitching. A starter is recommended for strong or large beers.
6 Tips for reusing yeast
Never use yeast from an infected batch
Yeast from highly hopped or high-alcohol beers may be stressed
Label the jar with date, yeast type, and batch name
Use a notebook or digital log to track generations and observations
A maximum of 5–6 generations is recommended; then switch to fresh yeast
Conclusion
Reusing yeast is a fantastic way to save money and maintain consistency in your brewing. Keep it clean, assess the condition of the yeast, and use the yeast calculator for accurate pitching. With a bit of practice, it’ll become a regular part of your brewing ritual.
Cheers and good luck with your next batch!
Sources:
BeerCraftr: "Reusing Yeast" (https://beercraftr.com/reusing-yeast/)
Brew Your Own Magazine: "Washing and Reusing Yeast"
Helderberg Homebrew Club: "Harvesting and Storing Yeast Slurry"
Brulosophy: "Pitch Rate Experiments"
John Palmer, How to Brew (book)
MoreBeer: "Yeast Storage and Viability"
Beersmith: "Using a Yeast Starter"
BrewFather and Brewer’s Friend calculators